


Nowadays, it is very rare that I build Gundams straight out of the box with no additional modifications. Most of the time, I would be using materials like pla-plates and other metal components to detail up my kits. So it is essential that I prime my models.
Well there is no special methods in using primers. Shake for one minute, warm it with hot water if you must and you are all set to go. There are of course some points to note (there is no right or wrong methodology) :-
- I prime all the parts including the internals and "those that cannot be seen after snapping on the armors". It's just a preference on my part. With this I can also achieve evenness of the paint job later.
- Wear a glove unless you want your boss to know what you do everyday :)
- Always hold the primer away from the model, depress as you approach the model, one direction, left to right. Several light coats to prevent flooding the details.
- Rotate the model when priming to ensure even coverage.
- Distance from the part to spray is about 20-30 cm. Too far, you will have a coarse surface and too near, you will "drench" your part.
The primer actually shrinks as it cures, protecting the details. And at this stage, certain mistakes become more visible. So it good to stop, sand and repair and re-prime again. Repeat the process until you are satisfied with the final product. Primers has a curing period of at least 24 hours, so no painting is recommended. Remember this is a make or break stage, so it is better to check the primed model many times before painting.
For primers, I use Mr Hobby white and grey primers. They come in aerosol cans or in bottles for airbrushing. I prefer using can sprays as it cut down precious time although coverage could be a issue for some.
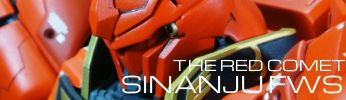
I use white primers only when I want my final coat to be bright for example the base coat of the Sinanju I did recently was white. Most of the time, most of the kits, I would be using grey primers.

Flooding of the part.

A more even coat
Mr Hobby Mr Base White 1000 - This will give you a pretty thick coat and hence you need some control otherwise excess primer will accumulate at the recesses of the parts. So apply several layers of thin coats with even rotation should do the trick.


Mr Hobby Mr Surfacer 1200 and 1000 - 1200 is of course finer but less easy to apply for me.
I tend to use up a lot of primers in one outing. I used up 8 cans for my Sinanju. It is a bit extravagant. I guess I got carried away. But for those who are cost conscious, you can try those bottled primers made for airbrushes. You need to use thinner to thin it before application. It is less costly but I find it a chore to use airbrush and cleaning it later. And you have to clean throughly or you risk damaging your AB permanently. However, one advantage is that it gives you control than spray cans so you don't "flood" your details and can achieve even coverage.


Well that is about all I know about primers. If you guys got any further inputs. please feel free to comment. I am pretty sure that I am not always right...
One of the readers, Kevin has provided a very useful insight to priming. Now let see...
"Hey, I notice that you said you stick your spray paint in "hot water". IMO thats not really ideal. Spray cans contain an enormous amount of pressures. Sticking you cans in "hot" boiling water may cause the can to rupture. (aka explode in your face) I know most cans nowadays comes with pressure release "fail-safe mechanics" build into the spray nozzle themselfs before "that" happens but its not something I would personally bet my face/life on.
I'm pretty sure you dont use boiling hot water to warm your cans but you might wanna change "hot" to something like "luke-warm" for those people that don't understand the difference.
My usually advice is to not use water so hot that it causes pain when you touch it. (should be comfortable)"
So guys take note and exercise caution when heating the can. I don't want any black faces on my blog LOL....
12 comments :
How much do the cans cost? Can the bottled primer be used for hand painting instead of airbrush? I don't have airbrush haha. Thanks in advance for answering.^^
Also, how do you warm the primer if it is in the spray can? Never used primer before, although I was thinking of giving it a try sometime....
I think you can use brush to apply but you will never get it free of brush marks.
Just place the can in hot water for a few seconds. About time you try bro...
Hey bro, thanks for answering. Now got another question. When you prime ar, do you prime piece by piece or prime the whole thing at once?
Priming is just like using spray paints right?^^
Hi Kenny, I have a question. Can the primer fade off if I apply thinner or the gundam eraser marker on it? I intend to create chipping effect after primer and paint. Thks.
@ Marzz, i usually prime piece by piece. I am pretty particular about this.
@Skyguy, no the primer will not fade away. And you still can do chip effect after painting.
As always your blog are very helpful for guy like me (newbie). Ive made some painting my self on my Cherudim but sometimes the paint making a bubble mark, how do i fix that?..
Hmmm.... I think it could be two explanation to this:
1. You stayed too close to the piece;
2. The spray can was not thoroughly shake.
Perhaps you could send me a picture so i can advise you better :)
Hey, I notice that you said you stick your spray paint in "hot water". IMO thats not really ideal. Spray cans contain an enormous amount of pressures. Sticking you cans in "hot" boiling water may cause the can to rupture. (aka explode in your face) I know most cans nowadays comes with pressure release "fail-safe mechanics" build into the spray nozzle themselfs before "that" happens but its not something I would personally bet my face/life on.
I'm pretty sure you dont use boiling hot water to warm your cans but you might wanna change "hot" to something like "luke-warm" for those people that don't understand the difference.
My usually advice is to not use water so hot that it causes pain when you touch it. (should be comfortable)
Side note: Keep up the good work, I love your kits! I wish my kits were as clean as yours.
Mini question:
I'm pretty bad at snipping off and sanding nubs, usually when I think the nubs are gone, I find them again after my primer coat. What's the best way around it? Should I spray a light layer to check or do it all in one go? (airbrush user)
Wow Kevin,thanks for your "face-saving" advice :) I think it is very nice of you to point that out to me and I really appreciate it. I presume you wouldn't mind if I included your comments in the post itself for others to see.
As for your question: 400 grit - 600 grit should remove the mark. Let me know if it's not working for you.
Cheers man!
No not at all. I'm pretty sure you don't wanna see your readers missing an eye when you meet up with them.
In anycase, I recently move back to HK and I had to give up a few tools during the move. I'm still trying to get some of that stuff back before I try to do another kit.
In Canada, I usually spray out in the garage but with the limited space here in my tiny HK apartment, I'm pretty sure I'd like to get a spray booth. Do you personally own one or have recommendations?
To be frank, I don't use a spray booth. Been painting without using one for years. But I'm think i might get one now...
Nice article. True that priming is probably one of the most important process before painting. Personally I use Kyron semi gloss paint primer (comes in many colours too, my preference is white), bang for bucks. The end result could be a bit coarse, but easily fixed with sponge wet sand. I use spray booth and a 3M N95 mask when priming.. also gloves. Safety first
Post a Comment